Please note, this video does include some explicit language. However, there is a version that’s safe for all audiences.
This and all of the other videos from #ChefConf are available on YouTube.
]]>Come DevOp with me! We’ll explore what DevOps is and what it is not.
]]>I was both honored and surprised when I learned that I had been chosen as the Engine Yard Innovator in the DevOps category.
“Our DevOps category winner is Nathen Harvey. A devops guru who has been travelling from conference to conference evangelizing the use of Chef, Nathen is known for his “Rails With Chef” proficiency. He works to help others understand the importance of backend compatibility. ”
I was asked to write a post about some my work. This seemed like a good time to reflect on some of the work I’ve been doing for the past few years.
In late 2009, I joined CustomInk to head up the Web Operations team. While there, I was able to help drive the adoption of many DevOps practices including automation, continuous delivery, collaboration across teams, expanded responsibility, and participation in open source communities.
At CustomInk, we transformed our infrastructure from one that was primarily hand-crafted, static, and managed by a few people to one that is flexible, automatically provisioned, and managed by many. We changed the way we deployed software going from two deploys a month to multiple deploys each day. Developers were no longer stuck waiting for the Operations team to deploy code; the Operations team no longer played the role of “merge monkey.” We redefined what it meant for a developer to be “done” with a bit of functionality: no longer was a commit to the master branch sufficient, the functionality wasn’t “done” until it was in production.
What were the results of these changes? We increased the number of deploys while dramatically reducing the number of rollbacks. We reduced the amount of time it took features to go from planning to production with a goal of minimizing the amount of work in progress at any given time. Developers and Operations collaborated on more projects each helping the other improve their skills, techniques, and processes. Our addiction to automation allowed us to deliver more value to our customers faster than ever before.
Many things enabled us to make such dramatic changes in our organization. One of the most important catalysts for these changes was the things we were learning from others in the technical community. We took ideas from other companies like Etsy and modified them to fit our needs. We learned about new tools and techniques from blog posts, podcasts, and conferences. We took time to learn and expirement with new tools, technologies, and techniques. We felt it was important to give back to the community.
I helped launch EngineerInk, the CustomInk Technology Blog and @custominktech, the twitter account for sharing CustomInk’s technology news. Additionally, I co-founded the Washington DC MongoDB Users Group and DevOpsDC. Both of these groups meet regularly to exchange ideas, share knowledge, and network. We are also known to enjoy a craft beer or two at each meeting.
I’ve been lucky enough to share some of our successes at various conferences including RailsConf.
The transformation, sharing, and success we enjoyed at CustomInk would not have been possible were it not for the attitude, dedication, and drive of the people involved. When it comes to technology though, the one tool that most directly enabled these changes is Chef, the configuration management framework from Opscode. I’ve written about our decision to use Chef and quite a few other articles about Chef on EngineerInk. Sure, Chef is a great and very powerful tool but there’s really a lot more to Chef than a bunch of Ruby code.
When I first started working with Chef, it reminded me of Rails when I first stated using it back in 2007. Here was a framework built around a strong, vibrant, and welcoming community. There were lots of building blocks (cookbooks, knife plugins, etc.) being developed and shared. Chef, like Ruby, felt dedicated to developer happiness. The best days at the office were those where I spent the majority of my time automating with Chef. In early 2012, I joined Bryan Berry on his Food Fight Show podcast to share news of newly published Chef Cookbooks - the “What’s Cookin’” report. I’ve since joined the show as a co-host and have been fortunate enough to interview some of the thought leaders in the DevOps movement. I’ve also had the opportunity to speak about Chef at a number of conferences including RubyNation, MongoDB Conferences, and #ChefConf.
In August, 2012, I left CustomInk to work as a Technical Community Manager at Opscode. This allows me to devote even more time evangelizing Chef and helping people learn Chef.
DevOps is not about tool choices and Chef isn’t required to adopt DevOps practices in your organization. However, DevOps does require passionate individuals who are excited to tackle tough challenges and enjoy working with technology, their colleagues, and the larger technical and business communities. For me, Chef is a tool and a community that make me happy, keep me passionate about the work I’m doing, and encourage me to share with others.
I would like to thank the entire team at Engine Yard for their continued support of the Ruby, PHP, Open Source, and DevOps communities. I truly am humbled to be selected as the DevOps Innovator.
]]>Part 4 of our Learning Chef tutorial was run as a Google+ Hangout that was streamed to YouTube.
In Part 4, we completed the application deploy and then looked at roles.
I’ll update this post soon with a breakdown of each step we took during this session. In the meantime, you can watch the entire video below.
Also, you can grab the code from the following repositories on github:
In Learning Chef - Part 5 we will move the MongoDB to it’s own VM.
In the meantime, please let us know what you think of this post and these videos! Drop a note in the comments or reach out to @nathenharvey or @mulpat on twitter.
]]>Part 3 of our Learning Chef tutorial was run as a Google+ Hangout that was streamed to YouTube.
In Part 3, we added a bunch of cookbooks from the community site including git, application, and application_ruby. After adding these cookbooks, we created a cookbook of our own to deploy a sample Rails application.
The application wasn’t fully deployed by the end of the tutorial but we’ll pick-up from there next time.
I’ll update this post soon with a breakdown of each step we took during this session. In the meantime, you can watch the entire video below.
Also, you can grab the code from the following repositories on github:
In Learning Chef - Part 4 we finish the deployment of the sample application and then explore roles.
In the meantime, please let us know what you think of this post and these videos! Drop a note in the comments or reach out to @nathenharvey or @mulpat on twitter.
]]>Part 2 of our Learning Chef tutorial was run as a Google+ Hangout that was streamed to YouTube.
Chef Solo allows you to run Chef Cookbooks without a Chef Server. There are a number of things that you don’t get when using Chef Solo. Check the Chef Solo page on the wiki for more information.
Now that we’ve got our Vagrant instance connected to Chef Server we can start managing the configuration of the VM with Chef. We’ll download a number of cookbooks from the Community Site and extract them into our Chef repository.
Here are the commands we ran to download each cookbook:
knife cookbook site download omnibus_updater
knife cookbook site download apache2
knife cookbook site download apt
knife cookbook site download build-essential
knife cookbook site download mongodb
knife cookbook site download passenger_apache2
After downloading each cookbook, extract it to the cookbooks directory of the chef-repo:
tar xzvf COOKBOOK_NAME.tar.gz -C cookbooks
Finally, upload each cookbook to the Hosted Chef server:
knife cookbook upload COOKBOOK_NAME
This video shows the process for grabbing the omnibus_updater
cookbook off of the community site.
knife cookbook site download omnibus_updater
tar xzvf omnibus_updater-0.0.5.tar.gz -C cookbooks
knife cookbook upload omnibus_updater
This video shows the process for grabbing the mongodb
cookbook, and it’s dependency, the apt
cookbook, off of the community site.
knife cookbook site download mongodb
knife cookbook site download apt
tar xzvf mongodb-0.11.0.tar.gz -C cookbooks
tar xzvf apt-1.5.0.tar.gz -C cookbooks
knife cookbook upload apt
knife cookbook upload mongodb
There are a number of ways to update a node’s run list. You can do so in a web browser while logged in to Hosted Chef or you can do so using knife.
In our session, we first used the Opscode Chef management interface.
You can also update your node’s run list using knife. In this video, we’ll use knife to add mongodb to the node’s run list.
export EDITOR=vim
- knife uses the EDITOR
environment variable to determine which application to launch when you edit the node."recipe[mongodb]"
to the run_list
chef-client
on the node using the vagrant provision
command.We’ll follow the same steps to add passenger_apache2
to our run list.
knife cookbook site download passenger_apache2
tar xzvf passenger_apache2-1.0.0.tar.gz -C cookbooks
knife cookbook site download apache2
tar xzvf apache2-1.3.2.tar.gz -C cookbooks
knife cookbook upload apache2
knife cookbook site download build-essential
tar xzvf build-essential-1.2.0.tar.gz -C cookbooks
knife cookbook upload build-essential
knife cookbook upload passenger_apache2
We will then add passenger_apache2
to the run list using knife node edit patrick_vm
. When we run vagrant provision
, we’ll hit an error that requires us to add apt
to the run list prior to passenger_apache2
.
By the end of this video, the run list should look like:
1 2 3 4 5 6 |
|
Finally, we updated the Vagrant configuration so that port 80 on the VM is forwarded to port 8080. This was done by adding config.vm.forward_port 80, 8080
to our Vagrantfile. Here’s the full Vagrantfile:
1 2 3 4 5 6 7 8 9 10 11 12 |
|
We now have the following in place:
In Learning Chef - Part 3 we install some more cookbooks and start writing our own cookbook to deploy a sample Rails application.
In the meantime, please let us know what you think of this post and these videos! Drop a note in the comments or reach out to @nathenharvey or @mulpat on twitter.
]]>In November of 2012, Patrick Mulder posted a request on the Chef mailing list. He was
“looking for some 1-1 teaching via skype to help me get going in setting up a basic DB server from scratch, as well as a basic dev server as intermediary step.”
I thought this would be an excellent opportunity to feed my recent addiction to Google+ Hangouts. I would provide Patrick some one-on-one tutoring if he would agree to having the sessions broadcast live on YouTube. We had some technical issues getting our first session going in a Google+ Hangout but we were able to meet via Skype and I captured video of the session.
Our goal is to help you get up and running on Chef by following our progress. The intent is to have additional sessions run via Google+ Hangouts that are steamed live to YouTube. This post includes our first session which has been broken into nine short videos. I hope you enjoy these videos and are able to learn something about Chef, too. Both Patrick and I are looking forward to your feedback on this experiment.
You can watch all of the videos in the YouTube playlist or keep reading and watch each video in turn.
In this video we introduce ourselves and the project.
In this video we visit the newly launched Chef Documentation Site and look over the Overview of Chef diagram.
For our project the Chef Workstation will be Patrick’s laptop, the Chef Server will be Opscode Hosted Chef, and the first node we create will be a virtual machine that is managed by Vagrant.
In this video Patrick will sign-up for a Hosted Chef account. We will use the free trial which allows you to manage up to 5 nodes for free. After signing-up and verifying his email address, Patrick will login to Hosted Chef at https://manage.opscode.com.
If you’re not the only one managing your infrastructure, you’ll want to invite you co-workers to join your Chef Organization. Watch this video to see how to invite another user to join your Chef Organization.
When managing your infrastructure as code, you’ll want to store that code in some source code repository. For this tutorial, we’re going to use git, a distributed version control system. The git repository will be publicly hosted on github.
Your workstation will need to have Chef installed. We verify that Patrick has already installed Chef but if you haven’t installed Chef on your workstation yet, you can grab it from http://www.opscode.com/chef/install/.
Next we create the Chef repository on the local workstation:
git clone git@github.com:opscode/chef-repo.git
This will clone the file and directory structure needed to get started with Chef. Of course, you could also just download a zip or tar.gz of the files from https://github.com/opscode/chef-repo/downloads.cd chef-repo
Change in to the directory that was just created.rm -rf .git
Remove the git directory from the cloned repository, we’re going to create our own git repo.git init
- Initialize a new git repository for our infrastructure code.The Chef server provides three files that must be in the Chef repository and are required when connecting to the Chef server. For Hosted Chef and Private Chef, log on and download the following files:
knife.rb
- This configuration file can be downloaded from the Organizations page.ORGANIZATION-validator.pem
- This private key can be downloaded from the Organizations page.USER.pem
- This private key an be downloaded from the Change Password section of the Account Management page.We’ll then move this files into a .chef
directory in our chef-repo.
Vagrant is a tool that makes it super easy to launch and manage virtual machines on your local workstation. We’re going to create a Vagrant-managed virtual machine to act as our Node. Vagrant manages each virtual machine as a “box.” Opscode makes a number of Vagrant boxes available through it’s bento project on github.com.
vagrant init
Vagrantfile
so that it contains (at least) the following:1 2 3 4 |
|
Finally, run vagrant up
to launch the Vagrant box.
Be sure to check the Vagrant website for more information about Vagrant.
The first time vagrant up
is run for this box, it must download the file from Opscode’s Amazon S3 file store. This can take some time so, while it’s running, you may want to expand your Vagrant file a bit more. We’ll configure Vagrant to use the chef_client
provisioner. You’ll find more information about the chef_client provisioner on the Vagrant website.
Here are the relevant settings in our Vagrantfile by the end of the video:
1 2 3 4 5 6 7 8 9 10 11 |
|
Be sure to check the Vagrant website for more information about Vagrant.
Congratulations!! You’ve now got a working Chef development environment including:
In Learning Chef - Part 2 we will grab some cookbooks from the Opscode Community Site and use those to start managing our node.
In the meantime, please let us know what you think of this post and these videos! Drop a note in the comments or reach out to @nathenharvey or @mulpat on twitter.
]]>git push
. In this post, we’ll iterate on the “Minimum Viable Test” idea by adding in support for knife’s cookbook testing.
Wait, I’m already running foodcritic, do I really need to run knife cookbook test
, too?
I’ll use a very simple example to demonstrate that you do.
Let’s create a very basic cookbook:
1 2 3 4 |
|
Next, we’ll write a flawed recipe:
1 2 3 4 |
|
Now, run foodcritic on this cookbook:
1
|
|
Foodcritic doesn’t throw any errors or find any problem with the cookbook.
Let’s try testing it with knife:
1 2 3 4 5 6 |
|
OK, it should now be obvious that knife cookbook test
should be included as part of our MVT.
To get Travis CI running knife cookbook test
for us, we’ll need to add or update the following files:
Of course, this assumes you’ve configured your cookbook as described in the previous post. Let’s start with the Rakefile.
1 2 3 4 5 6 7 8 9 10 11 12 13 14 15 16 17 18 19 20 21 |
|
In the file snippet above, I’ve only included the parts that are relevant for getting knife working. I’ll include the full source of the Rakefile at the end of the article.
Next, let’s add this rake task to our .travis.yml file.
1 2 3 4 5 6 7 8 |
|
To successfully run the knife command, Travis CI will need a very minimal Chef configuration.
1 2 |
|
And, of course, we’ll need to add Chef to our Gemfile. Be sure to specify a modern version as Travis CI will use 0.8.10 by default (at the time of this writing).
1 2 3 4 |
|
That’s it. On your next git push
Travis CI should run knife cookbook test
on your cookbook.
To run the rake tasks locally, you’ll need to tell bundler where the Gemfile is, or you’ll need to move it to the root directory of your cookbook and update .travis.yml appropriately. Use the following command to run your tests locally:
BUNDLE_GEMFILE=test/support/Gemfile rake knife
BUNDLE_GEMFILE=test/support/Gemfile rake foodcritic
You can checkout this Github compare view to see the changes made to the code from the previous post.
1 2 |
|
1 2 3 4 5 6 7 8 9 |
|
The Rakefile was refactored a bit since the previous post:
1 2 3 4 5 6 7 8 9 10 11 12 13 14 15 16 17 18 19 20 21 22 23 24 25 26 27 28 29 30 31 32 33 34 |
|
1 2 3 4 5 |
|
A big “Thank You!” shout-out to Seth Vargo for writing most of the code used in this post!
]]>git push
.
The idea of building automated tests for your infrastructure code has been getting a lot of traction lately. When it comes to Chef, many tools are starting to emerge.
The first tool in this area to get any significant traction, that I know of, was cucumber-chef. I first learned of this tool when I saw a pre-release copy of Test-Driven Infrastructure with Chef at the O’Reilly booth at Velocity Conf 2011. Stephen Nelson-Smith, the book’s author and framework’s lead developer, proposes an outside-in approach to testing where your tests can also act as monitors that look after the health of your infrastructure. I like the idea of this approach and feel it makes a lot of sense in a greenfield environment. One benefit of this approach is that it blurs the line between testing and monitoring. You can easily hook-up your monitoring system to your cucumber tests.
ChefSpec is another tool for testing your Chef code. It is a gem that makes it easy to write RSpec examples for Chef cookbooks. This style of testing allows you to execute your tests without needing to converge the node that your tests are running on. In other words, you can execute your tests without needing to provision a server. One huge appeal to this style of testing is that the feedback loop is very small. You’ll get feedback about your cookbook changes within seconds or a very few minutes of saving your changes.
Minitest Chef Handler is yet another tool for testing with Chef. This runs a suite of minitest tests as a report handler in your Chef-managed nodes. As you may know, report handlers are run at the end of each chef run, or convergence.
At the inaugural #ChefConf there were many sessions that included information about many companies’ approach to testing. Here’s a quick list of some of the sessions:
Food Fight Show Episode #10 - TESTALLTHETHINGS – This wasn’t actually part of #ChefConf but is ‘required listening’ for anyone interested in learning more about this space.
NTP Cookbook with tests - tests were added to this cookbook as part of the hackday event.
Foodcritic is a lint tool for your Chef cookbooks.
“Foodcritic has two goals:
To make it easier to flag problems in your Chef cookbooks that will cause Chef to blow up when you attempt to converge. This is about faster feedback. If you automate checks for common problems you can save a lot of time.
To encourage discussion within the Chef community on the more subjective stuff - what does a good cookbook look like? Opscode have avoided being overly prescriptive which by and large I think is a good thing. Having a set of rules to base discussion on helps drive out what we as a community think is good style.”
Given the plethora of options available, why should you start with Foodcritic? Well, you have to start somewhere. We felt Foodcritic was a good choice because it was easy to get started with, the tests ran quickly, and we are working under the assumption that once we started some automated testing, we’ll start layering on more and more pieces as we go. After some initial experiments, we found that we could get Foodcritic looking after our each cookbook in a matter of minutes and local tests running in seconds.
The pseudo-converge approaches (like ChefSpec) initially feel like we’ll need to do a lot of mocking that will take some time to get correct. The post-converge approaches (like cucumber-chef and minitest) will take longer to run and are a bit more complex.
One benefit of the post-converge approach is the ability to use your tests as health monitors. We already have monitoring in place and use it as an indicator that a node is fully provisioned. We call this “monitor-driven development.” Given that, it was better for us to get started with something that runs without requiring a full converge. Foodcritic fit the bill quite nicely.
Travis CI is:
“A hosted continuous integration service for the open source community.”
Using Travis CI in conjunction with Foodcritic, we’d have a basic automated test foundation to build on.
Using Foodcritic and Travis CI, you can quickly set-up a “minimum viable testing” (MVT) environment. The idea is that once you have some sort of tests running against your cookbooks, you’ll want to add more and doing so will be easy. Let’s look at how to add Foodcritic and Travis CI to your cookbook workflow.
Follow these steps to get everything set-up and ready for your first tests:
gem install foodcritic
The next step is to add a .travis.yml file to your project.
1 2 3 4 5 6 7 |
|
This file tells Travis CI how to build your project. We’ve specified the language (ruby) and the versions of ruby to use when testing this cookbook (1.9.2 and 1.9.3). We’ve also specified a Gemfile and script to execute when testing this project. Let’s add a Gemfile to a new directory in our cookbook, test/support
.
1 2 |
|
Our Gemfile is pretty simple, just include rake
and foodcritic
.
1 2 3 4 |
|
Finally, we’ll need to add a Rake file that will be run each time Travis builds our project.
1 2 3 4 5 6 7 8 9 10 11 12 13 14 15 16 17 18 19 20 21 22 23 24 25 26 27 |
|
This Rakefile will copy the contents of our cookbook to a temporary directory and run the foodcritic tests on the temporary directory. Note the --epic-fail
tag is used to fail the build (return a non-zero exit code) on any
rule that does not pass.
That’s it! When you push your commit to github, you should see Travis CI pick-up the changes, run your build, and report on status.
One final step that you may consider is adding a build status indicator to your README. This simple line in your README will let others know what the current build status is for your cookbook.
1
|
|
A big “Thank You!” shout-out to Fletcher Nichol and Eric G. Wolfe from whom I ‘borrowed’ the Rakefile
and .travis.yml
used in this post.
More information on Foodcritic and Travis CI can be found here:
Be sure to read the next post on this topic: MVT: knife test and Travis CI
]]>I gave this presentation at #ChefConf 2012.
Level-up your Chef skills by learning about these areas of Chef:
One thing I didn’t mention in the presentation was how to use the data from the encrypted data bag. I’ve updated the slides to include this info but it doesn’t appear in the video. In any case, here’s a quick demo of how you might use it:
1 2 3 4 5 6 7 8 9 10 11 |
|
Reposted from the CustomInk Technology blog.
]]>In this presentation, I provide an introduction to Chef with a focus on what you’ll need to know to get a Rails application up and running.
Topics include: * Introduction to Chef * Nodes, roles, environments, and other terminology * Introduction to cookbooks * Provisioning an environment for a Rails application * Deploying with Capistrano
You won’t be ready to compete in Iron Chef, but you will be ready to serve up your own Rails environment in no time.
I gave slightly different versions of this presentation at RubyNation 2012 and #ChefConf 2012.
I’d really appreciate any comments, questions, or feedback in the comments section below.
Reposted from the CustomInk Technology blog.
]]>There’s always a bit of tension when getting features from idea to production. In this talk, I describe some of the changes CustomInk has made to reduce this friction and keep the new features coming. Gone are the days of bi-monthly deploys, office pools dedicated to guessing when this deploy will be rolled back, and the ceremony surrounding the deploy-rollback-fix-deploy cycle. Today, ideas flow from product managers to developers to production with ease thanks to a number of changes that we’ve made to our teams, processes and tools.
Presenting at RailsConf was a really enjoyable experience and the presentation was well received. There were lots of questions from the audience after the presentation. Unfortunately, the Q & A section was not captured in the video. I’d really appreciate any questions or feedback you have, just drop a comment below.
Reposted from the CustomInk Technology blog.
]]>They were simple changes, adding a line or two to the services.yml file for each application. The details really aren’t important but let’s look at how we worked together to implement the changes.
In the past, here’s how the changes likely would have been implemented.
OR
We’ve been using Chef for some time and have just started asking our developers to help maintain their own apps. This week, two applications needed to know about some additional external services. This required a simple update to a YAML file in each application. In both cases, I asked the developers to clone our chef repo, make the changes they needed, and submit a pull request.
In one instance, the simple services.yml turned into a pull request with updates to a number of nagios nrpe checks that we’re running. Something that the developer didn’t ask for originally but took the initiative to add while in the code.
Thanks to @chmurph2 and @jmorton for taking their first steps into Chef.
Is this a huge accomplishment? No. But it is a great first step.
”.@nathenharvey Working together == every engineer is on the same team and you stop celebrating (or thinking about) cross-team collaboration.”
We’ve always worked as one team but continue to have some clear areas of responsibility. While I understand what Brian’s saying, I’m not sure everyone doing everything makes sense. We’re one team but we each have our strengths. Agree that we should stop celebrating about this a cross-team collaboration; it should be the norm. But, we have to start somewhere and these were the first steps into the world of infrastructure as code for the developers. In my mind, that’s a WIN!
]]>It is easy enough to get Green Screen up and running on your own server or VM. The project’s README includes all the information you’ll need for doing so. In this post, I’ll describe the steps necessary to run Green Screen on Heroku or on your own server using Chef.
Deploying to Heroku is probably the easiest way to get up and running with Green Screen. You’ll need a Heroku account but a free one should be sufficient. Check the quick start guide if you don’t yet have an account.
Once you’ve got your Heroku account set-up, simply follow these steps to get your Green Screen app deployed:
git clone git@github.com:customink/greenscreen.git
cd greenscreen
gem install heroku
heroku create
git push heroku master
heroku open
If your build servers are running on the Internet, Heroku may be all that you need.
Warning this default Green Screen looks at all of the builds currently running on http://ci.jenkins-ci.org. This is fine for demo purposes but you may find it to be a bit overwhelming since it’s over 300 builds at the time of this writing.
You can see a sample of this app running at http://greenscreenapp.com
If your build servers are not publicly accessible, Heroku won’t be a great option. CustomInk has published a Chef cookbook for setting up Green Screen on one of your nodes.
You simply need to include the greenscreen recipe to install, configure, and run one or more GreenScreen applications. Or add it to your role, or directly to a node’s recipes.
1
|
|
Of course, if you’re just getting started with Chef, you should look at Vagrant which is a tool for building and distributing virtualized development environments. With Vagrant, you can quickly spin-up a VM in VirtualBox and have it use the greenscreen cookbook.
The cookbook allows you to specify credentials and jobs to include or ignore with each server and allows you to set-up multiple Green Screens on the same node. At CustomInk, we use different Green Screen applications for different teams.
Here’s an excerpt from one of our Chef environment files:
1 2 3 4 5 6 7 8 9 10 11 12 13 14 15 16 17 18 19 20 21 22 23 24 25 26 27 28 29 30 31 32 33 34 35 36 37 38 39 |
|
With this configuration, we have 2 Green Screens running, on ports 4567 and 4568. Both are polling build servers and showing different jobs. For instance, the server on 4567 excludes the www_redirects build (:ignore_jobs => ["www_redirects"]
) whereas the server on 4568 only includes this build (:jobs => ["www_redirects"]
) when polling the build03 server.
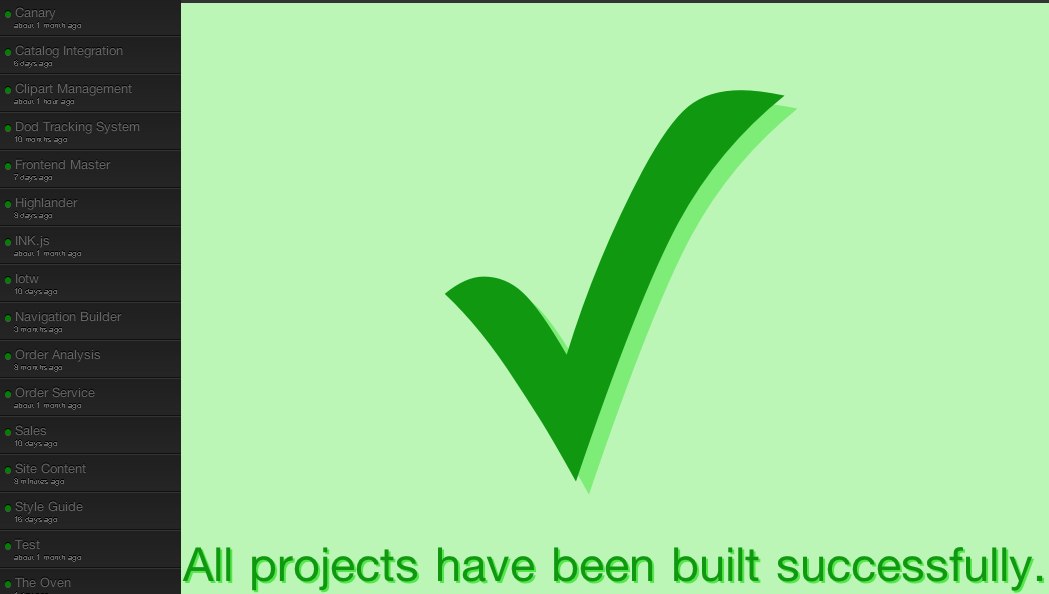
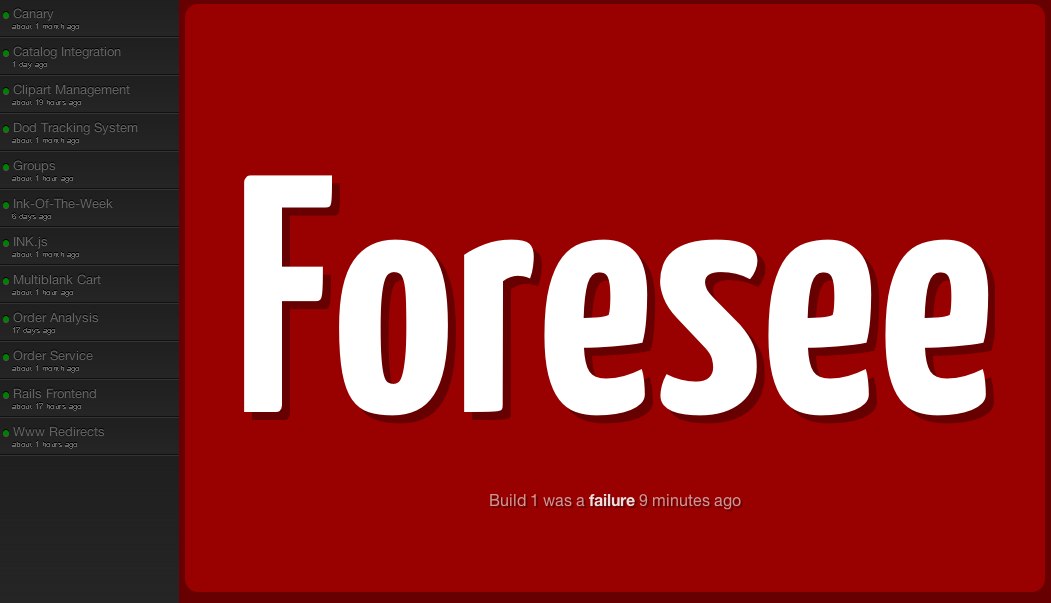
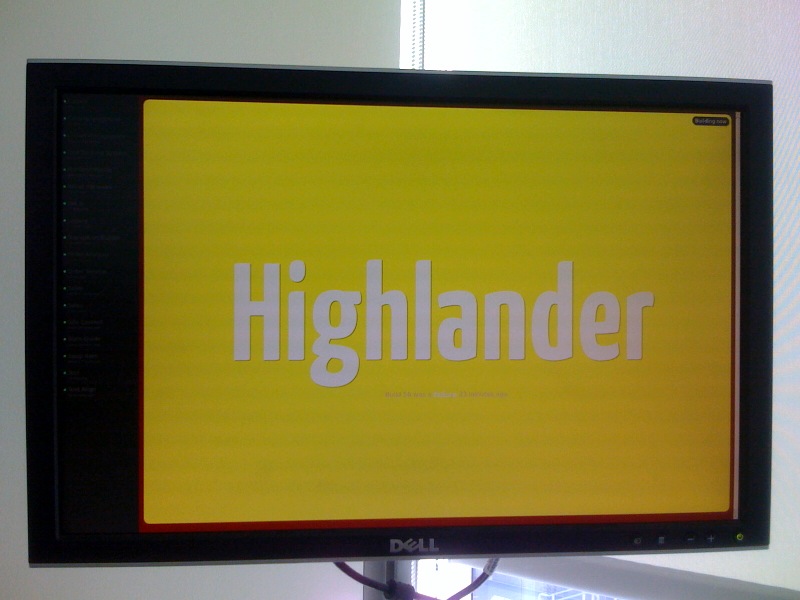
We use Green Screen at CustomInk to look after our continuous integration servers, currently 3 Hudson servers and one Jenkins cluster. We have a monitor mounted in the engineering office that makes it easy for everyone to quickly assess the build status.
Green Screen is a simple Sinatra application that is easy to configure and deploy. It works well with any continuous integration server that conforms to the multiple project summary reporting standard.
You can see a sample Green Screen app running at http://greenscreenapp.com. Be forewarned, this sample Green Screen looks at all of the builds currently running on http://ci.jenkins-ci.org. This is fine for demo purposes but you may find it to be a bit overwhelming since it’s over 300 builds at the time of this writing.
Green Screen was originally implemented by Marty Andrews and announced on his blog in 2009. In the original version, a build that was in progress would blink on the screen.
Rhett Sutphin improved the layout of green screen and introduced a new color, yellow, for builds that are in progress.
After using these versions for a while at CustomInk, we decided that the most important thing to know was which builds were failing. Once you get past a handful of builds, it’s no longer very interesting to see every build. We forked Rhett’s version and created a new layout for Green Screen.
If everything is passing, the screen is basically one giant checkmark.
If there are any failing builds, they’re shown in the main area while all others are displayed on the right.
Finally, a build that previously failed will be shown in yellow while it’s rebuilding.
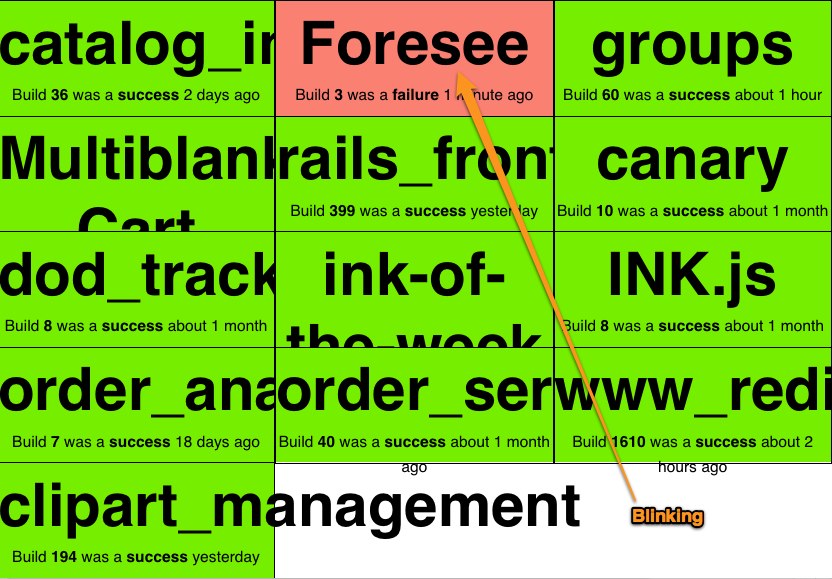
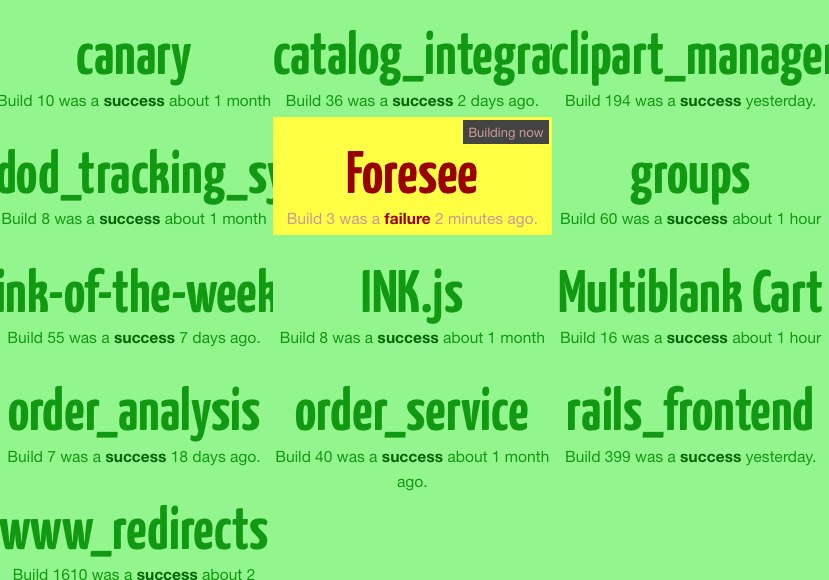
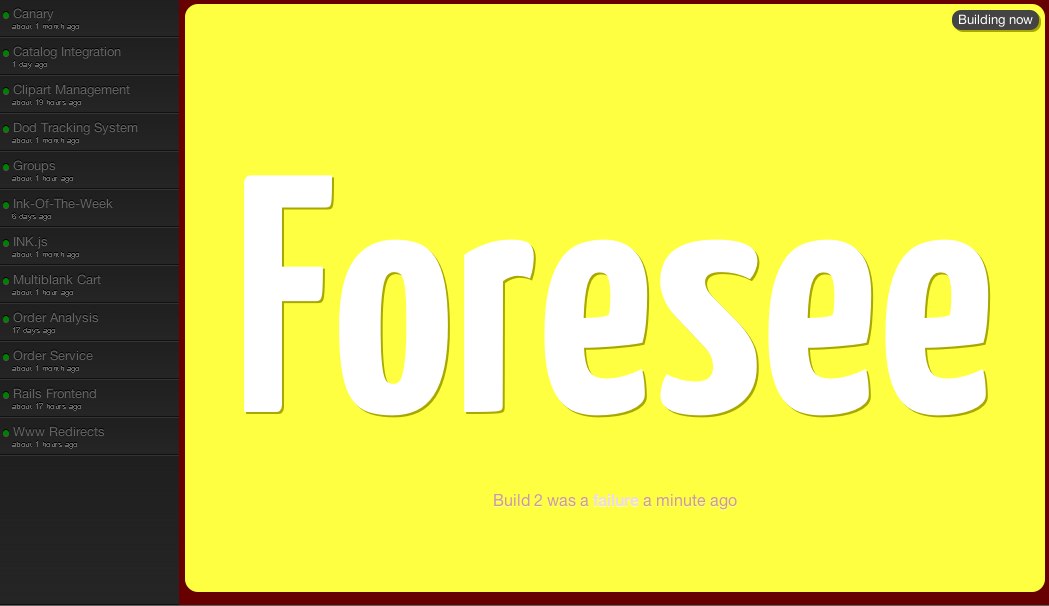
We’ve also added support for controlling which builds are displayed from each CI server. So that you can explicitly include or exclude builds or just go with the default behavior of showing all builds on the server.
I’ll cover a couple of deployment options for Green Screen in my next post.
]]>Creating and editing posts in a text editor instead of a browser is a step-saver for me. Previously I always worked with a local copy of each article and would cut-n-paste between my text editor and the browser.
The rake- and git-based workflow feels very natural. After all, this is a “blogging framework for hackers.”
The standard layout and plugins are working well for me with little customization.
Deploying is a snap. I’m currently using Heroku to host the blog but could just as easily be using github:pages.
The simplicity and familiar workflow really make for an excellent blogging platform! Thanks @imathis for giving us Octopress!
]]>There were 3 different categories:
This is the first year that 10gen has organized these awards. I think they’re a great way to recognize the contributions made by a few members of the community. I hope a significant portion of people in the community took the time to nominate or vote for another individual. I suspect more community members will participate and 10gen will do a more to advertise the program in years to come.
I was honored to be selected as a finalist in the Community Champion category. As a co-organizer for both the Washington DC MongoDB User Group and DevOps DC, I work to bring together people who are interested in MongoDB and other great technologies. We’ve grown the MongoDB group to over 250 members through consistent meetings, detailed event summaries, and good beer.
Shortly before the voting was opened to the public, 10gen announced the grand prize: a trip to South By Southwest Interactive. The nomination and being selected as a finalist were a great recognition of my effort and accomplishments. However, I’ve always wanted to got to SXSW. Once I found out this was the prize, I was really excited at the possibility of winning the award!
As I reviewed the finalists, I was pretty certain I wouldn’t be selected as the winner. Everyone on the list has made some incredible contributions to the community.
At the end of MongoSV the winners were announced. It was quite a surprise to find out I’d been selected as the winner in the Community Champion category! This was the perfect end to a great two days for me which included the MongoDB Masters Summit and presenting at the conference.
A heartfelt THANK YOU is in order for all of the members of the MongoDC group who nominated and voted for me, for 10gen for organizing the contest and awards, and my colleagues, friends, and family who ‘rocked the vote’!
I’m looking forward to meeting up with the other Community Award winners in Austin!
]]>“MongoSV is an annual one-day conference in Silicon Valley dedicated to the open source, non-relational database MongoDB. The comprehensive agenda includes 50+ sessions covering topics for both the novice and experienced user, with presentations from 10gen engineers as well as MongoDB users.”
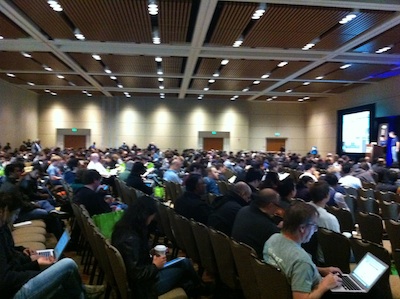
I’ve been to a few other similar MongoDB events in NYC and DC but this was the largest by far. There were over 1,000 attendees and 5 tracks plus whiteboard and birds of a feather sessions.
As freeing as a document store is, there’s still work to be done in designing how you’ll store and retrieve your data. It’s super-easy to get up and running without giving this much thought but you will need to design your documents eventually. There were at least 3 sessions about schema design during MongoSV.
The new aggregation framework is great, highly anticipated, and much needed. During the Keynote, Eliot Horowitz demonstrated an application built on MonogDB that used the Twitter API to capture tweets related to the day’s events. The demo site ran throughout the day and was used in a contest to see who tweeted the most about the conference and who was mentioned most. The source code for the app was subsequently made available on github. Check out Chris Westin’s presentation on MongoDB’s New Aggregation Framework.
My presentation, ”MongoDB at CustomInk - Adoption, Operations, and Community”, detailed some of the reasons we decided to go with MongoDB, the challenges we faced bringing it into the organization, how we’re using it in production today, lessons learned, and some of our future plans. I also covered some of the operational considerations for putting MongoDB into production: how do we deploy, operate, and monitor MongoDB. I also described CustomInk’s involvement in the MongoDB community.
You can catch a video of my presentation on the 10gen site or just checkout the slides below.
It was great to meet Kenny Gorman from shutterfly and share some of our experiences with MongoDB. shutterfly and CustomInk have a lot in common. Of course, both are online retailers but some other things that we share include:
Of course, there are plenty of differences, too. shutterfly is publicly traded and larger than CustomInk.
It was interesting to see how shutterfly’s approach to adopting MongoDB is very similar to CustomInk’s. Both store product data in MongoDB but order data lives in relational databases.
Check out Kenny’s Performance Tuning and Scalability presentation.
Using MongoDB on Amazon’s AWS was, not surprisingly, another hot topic. I think that if either shutterfly or CustomInk were to launch their business today, they’d likely look to AWS, or something similar, to house their infrastructure. The truth of the matter is that in 1999 that simply wasn’t an option so neither company stared there. At CustomInk, we have started moving some of our production services out of the data center and into alternate hosting environments (managed hosting or “the cloud”). However, the real sweet spot for us with AWS, at the moment, is staging and test servers. With AWS, we have the ability to quickly, easily, and inexpensively spin up a separate environment for each development branch.
The “developer happiness” that MongoDB affords does not make it immune to the “operational considerations” that every platform must take into account. These considerations vary from one environment to the next (bare metal, vm in a data center, managed hosting, “the cloud”, etc.) Application that are not built to take advantages of the strengths of each environment will eventually suffer the consequences of running there. Those consequences may include downtime, poor performance, and/or lots of operational complexity.
Check-out all of the presentations from the conference on the 10gen site.
The conference also included the announcement of the MongoDB Community Award winners. But that’s a story for my next post.